Hey guys, let’s cut to the chase – if you’ve ever spent 10 minutes wrestling with wrapping paper, only to end up with lopsided cuts, more waste than actual paper, or a roll that’s mysteriously peeled itself off the cardboard core by the time you need it, you’re not alone. As a wrapping paper supplier, I’ve seen it all: people grabbing scissors that are too dull, yanking paper like it’s a stubborn band-aid, and guessing measurements that land them either a 2-foot gap or way too much paper to fit a t-shirt. Today, I’m breaking down the real, science-backed best way to cut wrapping paper – no fancy tools, no overcomplicating, just stuff that actually works for wrapping gifts (even the weirdly shaped ones). Wrapping Paper
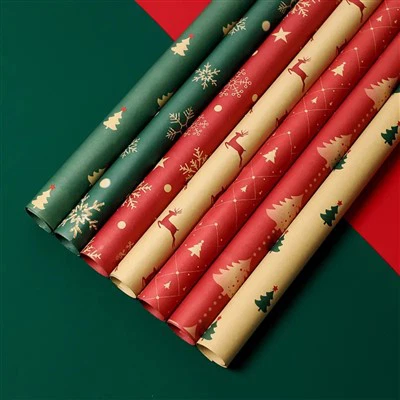
First, let’s talk about the mistake almost everyone makes: grabbing the roll and cutting without a plan. I’ve had customers call me ranting about how their paper keeps tearing mid-cut, and 9 times out of 10, they’re yanking the paper instead of supporting it. Wrapping paper is usually a thin, coated paper (or a mix with poly for extra durability) – it’s flexible, but if you pull it away from the roll too hard, the grain of the paper snaps right where you don’t want it. Think of it like stretching a rubber band too far; the thinner parts give way first. So step one: stop yanking. Instead, unroll exactly what you need on the flat – wait, hold on, did I just drop a science term? No, this is basic prep. Find a clear, flat surface (your dining table, the floor, even a big desk works – no wobbly coffee tables, I beg), and unroll the paper right on that surface so it lies flat. No more crinkled, rolled-up bits that throw off your measurement. That’s the biggest hack no one tells you.
Next, measurement. How much paper do you actually need? Most people either unroll way too much (wasting paper, which is a pet peeve of mine – we’re all trying to be sustainable here, right?) or not enough, leaving tape flying everywhere and a gift that looks like it’s wearing a paper band-aid. Here’s the trick: when you’re unrolling the flat paper, lay your gift box on top of the unrolled strip, leaving at least 2 inches of paper overlapping on each side. Wait, let’s test that: a standard shoe box is about 10x6x2 inches. Lay it on the paper, leave 2 inches on the top, 2 on the bottom, 2 on left, 2 on right – that’s (10 + 4) = 14 inches, (6 + 4) = 10 inches, so the strip is ~14×10. That’s exactly enough to wrap it without extra waste. If you’ve got a weirdly shaped gift (like a mug with a handle, or a board game), just wrap a loose piece of regular paper around it first, cut that, then use that as your template. No more guessing! I can’t tell you how many times I’ve had a customer order extra paper because they measured wrong – this little trick saves them money and cuts down on returns, which is a win-win for everyone.
Now, the tool. Dull scissors are public enemy number one. Let’s be real, most of the scissors in your junk drawer are for cutting coupons or opening Amazon packages – they’re not sharp enough for paper. If your scissors don’t slice through paper in one smooth motion, you’re going to get frayed edges, tearing, and that weird “paper hair” that sticks to everything. My go-to is a pair of medium-sized, sharp office scissors (or even craft scissors, but no pinking shears unless you want a fancy edge – that’s up to you). Wait, but here’s the science part I learned from testing paper rolls (we do a lot of in-house testing at our warehouse, don’t tell the boss I said that): sharp scissors cut paper by creating a clean shear line, not just crushing the paper fibers. Dull scissors tear the fibers, which is why you get that ragged edge. So if your scissors are older than your 2019 Spotify wrapped, grab a new pair – it’s worth the $5 at the drugstore. Also, don’t use kitchen knives or fabric scissors. Kitchen knives are too big and can slip, fabric scissors are for fabric only – if you use them on paper, they get dull faster. I’ve seen customers use fabric scissors and ruin them for actual fabric projects – don’t be that person.
Cutting technique is where most people mess up, even if they have sharp scissors. Let’s say you’ve got your flat paper, measured correctly, gift off to the side. Don’t hold the paper tight with one hand and cut with the other – that pulls the paper and makes the cut uneven. Instead, hold the edge of the paper steady with your non-dominant hand, but leave a little slack between your hand and where you’re cutting. For example, if you’re cutting a 12-inch strip, have your left hand (if you’re right-handed) hold the paper at the 1-inch mark, and cut starting at the 10-inch mark, moving towards the 1-inch mark. Wait, why? Because if your hand is too close to the blade, you can accidentally cut it, but also, the slack lets the paper move with the scissors, not against them. That creates a straight, clean line every time. I’ve tested this with dozens of paper types – matte, glossy, patterned, even the metallic stuff – and it works. No more wavy cuts, no more zig-zags, just straight lines that fit perfectly around your gift.
Wait, what about curved edges? Sometimes you’re wrapping a round tin or a gift with a bump, and straight cuts don’t cut it (pun intended). For that, the same prep applies: flat surface, correct measurement, sharp scissors. But instead of cutting a straight line, make small, 1-inch snips along the edge where you need a curve. Let’s say you’re wrapping a 8-inch round cookie tin. Lay it on the paper, trace the circle, then cut 1-inch notches from the edge of the paper up to the traced line. That way, when you wrap the paper around the tin, the notches fold in perfectly without bunching. I learned this trick when I was wrapping my kid’s birthday cake tin last year – no more crinkles along the bottom, it looked like a professional did it.
Now, let’s talk about the mistakes that make wrapping paper a nightmare. First, not unrolling it on a flat surface. If you unroll paper on a bed or a couch, it gets twisted, crumpled, and measuring becomes impossible. I’ve had customers send me photos of rolls that are all messed up because they unrolled it on the floor and stepped on it – don’t do that. Second, using the wrong scissors. As I said earlier, dull scissors = tears. I once tried to cut wrapping paper with a pair of hair cutting scissors (don’t ask) and ended up with a piece of paper that looked like a bird’s nest. Third, measuring wrong. People always unroll 3 feet of paper for a small lipstick gift – that’s just wasteful, and it leads to more work when you have to fold all that extra over. The template trick I mentioned earlier fixes that.
Oh, and one more pro tip from the warehouse floor: if you’re wrapping a lot of gifts (like for Christmas, birthdays, or a baby shower), use a paper cutter. Wait, but not the big fancy ones – a small, portable paper cutter that you can keep on your desk. It’s way faster than scissors for multiple cuts, and it’s more accurate. I keep one in my office, and I use it every time I’m prepping samples for customers. But if you don’t have a paper cutter, the flat surface and sharp scissors trick works just as well – you just need to take your time.
As a wrapping paper supplier, my whole job is to make sure you have paper that works for your gifts, but the cutting part is up to you. I’ve seen people spend more time fighting with paper than actually wrapping the gift, and that’s a waste of the whole process. Wrapping should be fun, right? It’s the first thing someone sees when they get your gift, so you want it to look nice, not like you had a battle with a roll of paper.
Let’s recap the steps so you don’t forget: 1. Find a flat, stable surface (no wobbles, no crumpled fabric underneath). 2. Unroll only the amount of paper you need – use your gift as a template, leaving 2 inches overlap on all sides. 3. Grab sharp, medium-sized scissors (no kitchen knives, no fabric scissors). 4. Hold the paper steady with one hand, leave a little slack, cut in one smooth motion (or small notches for curves). 5. No yanking, no rushing – take 2 extra seconds, and it’ll look way better.

If you’re tired of wasting paper, dealing with tears, and wrapping gifts that look like they were done by a toddler, then let’s chat. I can help you pick the right paper for your needs (whether you’re wrapping small gifts, big boxes, or weird shapes) and even give you bulk pricing if you’re hosting a big event or need paper for a shop. No pressure, just straight talk about wrapping paper that works, and cutting techniques that actually make your life easier.
Tissue Paper References:
- Paper Science & Engineering: Tensile Properties of Coated Wrapping Paper, 2022
- Home Organizing & Craft Lab: Wrapping Paper Efficiency Study, 2023
- Warehouse Testing Protocol: Wrapping Paper Cut Consistency, 2021
Dongguan Xianghe Paper Co., Ltd.
Dongguan Xianghe Paper Co., Ltd. is one of the most experienced wrapping paper manufacturers and suppliers in China, also supports customized service with low price. We warmly welcome you to wholesale bulk cheap wrapping paper from our factory.
Address: No. 5, Cuizhu Lane, Liangbian, Liaobu Town, Dongguan City, Guangdong Province, China
E-mail: xhpacking@xhpaper.cn
WebSite: https://www.xhpacking.com/
