Soldering in hard-to-reach places can be a daunting task, even for seasoned professionals. However, with the right tools and techniques, it becomes not only manageable but also efficient. As a gas torch supplier, I’ve witnessed firsthand the transformative power of a well-chosen gas torch in such scenarios. In this blog, I’ll share some valuable insights on how to use a gas torch for soldering in those tricky spots. Gas Torch

Understanding the Basics of Gas Torches
Before delving into the specifics of soldering in hard-to-reach places, it’s crucial to understand the basics of gas torches. Gas torches work by mixing a fuel gas, such as propane or butane, with oxygen or air. This mixture is then ignited at the torch tip, producing a high-temperature flame that can melt solder.
There are different types of gas torches available in the market, each with its own set of features and applications. For soldering in hard-to-reach places, a small, handheld gas torch is often the best choice. These torches are lightweight, easy to maneuver, and can provide precise control over the flame.
Choosing the Right Gas Torch
When selecting a gas torch for soldering in hard-to-reach places, several factors need to be considered. Firstly, the torch should have a narrow and flexible tip. A narrow tip allows you to access tight spaces, while a flexible tip can be bent to reach angles that are otherwise difficult to access.
Secondly, the torch should offer adjustable flame control. This is important because different soldering tasks require different flame intensities. For example, delicate soldering jobs may require a low-intensity flame, while larger joints may need a more powerful flame.
Thirdly, the fuel capacity of the torch is also a consideration. If you’re working on a large project that involves multiple hard-to-reach spots, a torch with a larger fuel capacity will save you the hassle of frequent refills.
Preparing for Soldering
Once you’ve chosen the right gas torch, it’s time to prepare for soldering. Start by ensuring that the work area is well-ventilated. Gas torches produce fumes that can be harmful if inhaled in large quantities, so it’s important to work in a space with good air circulation.
Next, gather all the necessary tools and materials. In addition to the gas torch, you’ll need solder, flux, and a cleaning brush. The cleaning brush is used to remove any dirt or oxidation from the surfaces to be soldered, ensuring a strong bond.
Before lighting the torch, make sure the gas supply is turned on and the fuel tank is securely attached. Check the torch tip for any blockages or damage. If the tip is dirty or blocked, use a small wire or a cleaning tool to remove the debris.
Lighting the Gas Torch
Lighting a gas torch may seem simple, but it’s important to follow the correct procedure to ensure safety. First, adjust the gas flow control valve to the desired level. This will determine the size and intensity of the flame.
Most modern gas torches come with an ignition system, such as a piezoelectric igniter. If your torch has an igniter, press the ignition button while slowly opening the gas flow valve. If the torch doesn’t have an igniter, you can use a match or a spark lighter to ignite the gas at the torch tip.
Once the torch is lit, adjust the flame to the desired setting. A neutral flame, which is neither too rich nor too lean, is usually the best for soldering. A neutral flame has a well-defined inner cone and a pale blue outer flame.
Soldering in Hard-to-Reach Places
Now that you’ve prepared the work area, gathered the necessary tools, and lit the gas torch, it’s time to start soldering in hard-to-reach places. Here are some tips to help you succeed:
Use the Right Angle
One of the keys to soldering in hard-to-reach places is to use the right angle. Position the torch tip so that the flame is directed towards the joint you want to solder. If the angle is incorrect, the solder may not flow properly, resulting in a weak joint.
For example, if you’re soldering a joint in a narrow gap, you may need to tilt the torch slightly to get the flame into the space. Use a mirror or a flexible borescope to help you see the joint clearly and ensure that you’re applying the flame at the correct angle.
Apply Flux
Flux is an essential component in soldering. It helps to remove oxidation from the surfaces to be soldered and promotes the flow of solder. Apply a small amount of flux to the joint using a flux brush or a flux pen. Make sure the flux covers the entire joint area.
When soldering in hard-to-reach places, you may need to use a specialized flux applicator. Some torches come with a built-in flux applicator, while others may require a separate tool. Choose an applicator that is suitable for the size and shape of the joint.
Control the Heat
Controlling the heat is crucial when soldering in hard-to-reach places. Too much heat can damage the surrounding components, while too little heat may result in a poor solder joint. Use the adjustable flame control on the torch to regulate the heat.
Start by applying a gentle heat to the joint. Wait for the flux to become active, which is indicated by a change in color. Once the flux is active, apply the solder to the joint. The solder should melt and flow easily into the joint.
If the solder doesn’t seem to be flowing, increase the heat slightly. However, be careful not to overheat the joint. If you notice any signs of discoloration or damage to the surrounding components, reduce the heat immediately.
Use Extension Tips or Nozzles
Some gas torches come with extension tips or nozzles that can be used to reach difficult spots. These accessories can be very useful for soldering in places that are deep or narrow.
Extension tips are usually longer and thinner than standard torch tips, allowing you to reach into tight spaces. Nozzles, on the other hand, are designed to direct the flame in a specific way. For example, a focused nozzle can be used to concentrate the heat on a small area.
When using extension tips or nozzles, make sure they are securely attached to the torch. Follow the manufacturer’s instructions for installation and use.
Finishing Up
Once you’ve completed the soldering job, allow the joint to cool down completely before handling it. This will ensure that the solder has solidified and the joint is strong.
After the joint has cooled, clean the area with a cleaning brush to remove any excess flux or solder. Inspect the joint for any signs of defects, such as uneven solder flow or poor adhesion. If necessary, reheat the joint and add more solder to correct any problems.
Conclusion
Soldering in hard-to-reach places is a challenging but achievable task with the right gas torch and techniques. As a gas torch supplier, I understand the importance of providing high-quality products that meet the needs of professionals and DIY enthusiasts alike.
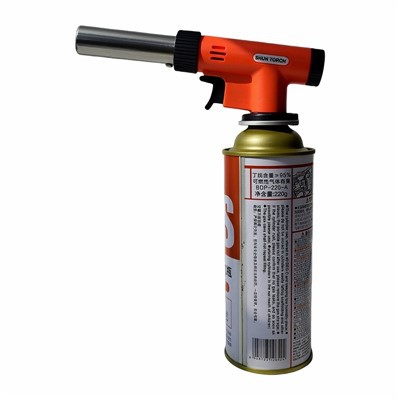
If you’re in the market for a gas torch for soldering in hard-to-reach places, I invite you to explore our range of products. We offer a variety of gas torches with different features and specifications to suit your specific requirements. Whether you’re a professional plumber, an electronics technician, or a hobbyist, we have the right torch for you.
Butane Gas Torch Contact us to discuss your soldering needs and explore our product options. Our team of experts is ready to provide you with the guidance and support you need to make an informed decision. We look forward to assisting you with your next soldering project.
References
- "Soldering Handbook" by ABC Publishing
- "Gas Torch User Manuals" various manufacturers
Yuhuan Shunshida Intelligent Electromechanical Co., Ltd.
As one of the most professional spray gun manufacturers and suppliers in China, we’re featured by quality products and good service. Please rest assured to buy durable spray gun at low price from our factory. We also accept customized orders.
Address: No. 186 East Nanxing Road, Chumen Town, Yuhuan City, Zhejiang Province
E-mail: yuhuanshunshida@gmail.com
WebSite: https://www.cmssdgastorch.com/
